Let's create our own Crypto coin, easy and in just a few minutes (no coding knowledge).
- Puttarak Khwan
- Cryptocurrency , categories/cryptocurrency Blockchain , categories/blockchain Programming categories/programming
- 05 Dec, 2021
Hello everyone who stumbled upon and came to read. I’ve been away from writing a blog for a while. Caught up with work, trying this and that, blah blah blah. But now it’s time to come back and write again 💪.
Many people are probably familiar with coins like BTC, ETH, BNB, ADA, SOL, and others. Each of these coins incorporates Blockchain technology and has unique concepts and strengths. As we delve deeper into this industry and start accumulating coins, I couldn’t resist getting involved as well. I wanted to have my own coin (since I couldn’t buy one, I decided to create my own). So, that’s the topic for today’s content 😂.
You need to know
- To create your own coin, you need to have a Metamask wallet (how to create a wallet).
- Make sure that your Metamask wallet is connected to the Binance Smart Chain Network.
- Additionally, it’s recommended to have some BNB coins in your Metamask wallet to cover the Gas fees for creating your coin (how to transfer coins to Metamask).
- This content explains how to create a coin on the Binance Smart Chain.
- It is intended for learning purposes and to create a token for educational exploration.
Let’s get started!
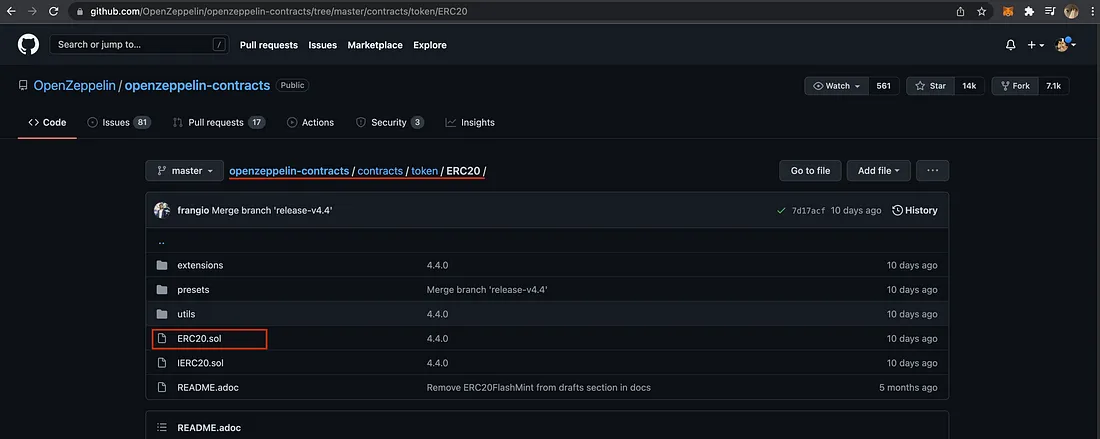
- Go to GitHub -> https://github.com/OpenZeppelin/openzeppelin-contracts, then click on contracts -> token -> ERC20 and open the file
ERC20.sol.
-
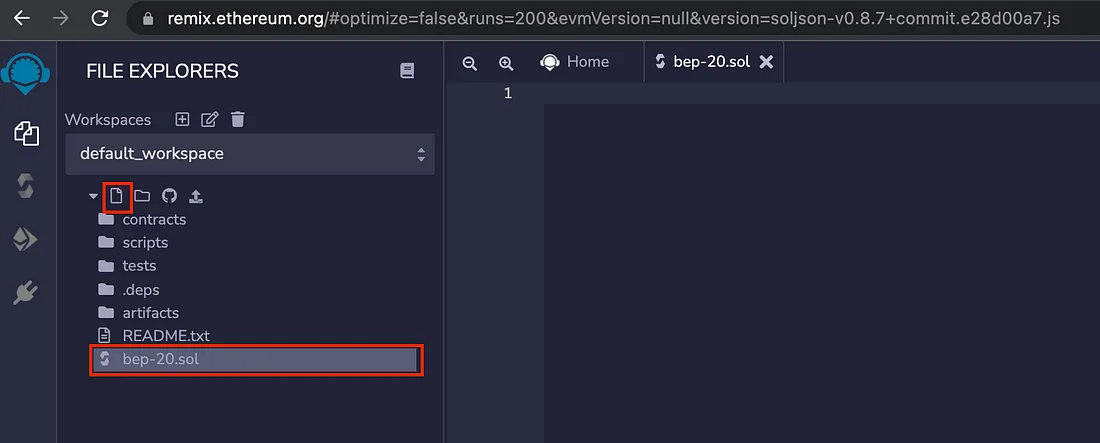
Open the website https://remix.ethereum.org/.
-
Next, in the left-hand sidebar, we will create a new file named
bep-20.sol(This is the file where you will write the Smart Contract for your own coin. In this case, we will use the Smart Contract code from OpenZeppelin).
- Next, let’s write the file ->
bep-20.soltogether. You can directly copy and paste the code below.
pragma solidity ^0.8.0;

import "https://github.com/OpenZeppelin/openzeppelin-contracts/blob/master/contracts/token/ERC20/ERC20.sol";

contract MoonMetro is ERC20 {
    constructor(uint256 initialSupply) public ERC20 ("MoonMetro", "MMT") {
        _mint(msg.sender, initialSupply);
    }
}
Let me explain a bit further:
- Line 3: This is the URL that you copied from Step 1.
- Line 5: MoonMetro is the full name of the coin you are going to create.
- Line 6: “MoonMetro” must match the name on line 5, and “MMT” is the coin’s abbreviation that will be used for the token’s name and symbol. You can change the abbreviation according to your preference 😁.
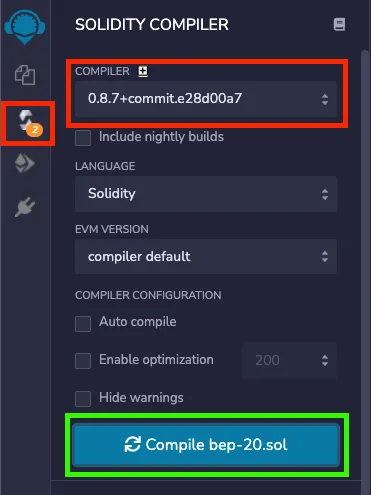
- Next, let’s compile the Solidity code. Select the left-hand sidebar and click on the Compile
bep-20.solbutton.
- After the compilation is completed, we will select the ‘Deployment’ menu to review the information before clicking on ‘Deploy’.
- Environment: Select ‘Injected Web3’.
- Account: Choose the Metamask account that is connected to the BSC chain.
- Contract: Select the name of the coin you are about to create.
- Amount of Coins: In this example, I will create a total of 10,000 coins, so we need to enter 10,000 x 10¹⁸ (add 18 zeroes after 10,000) as the amount.
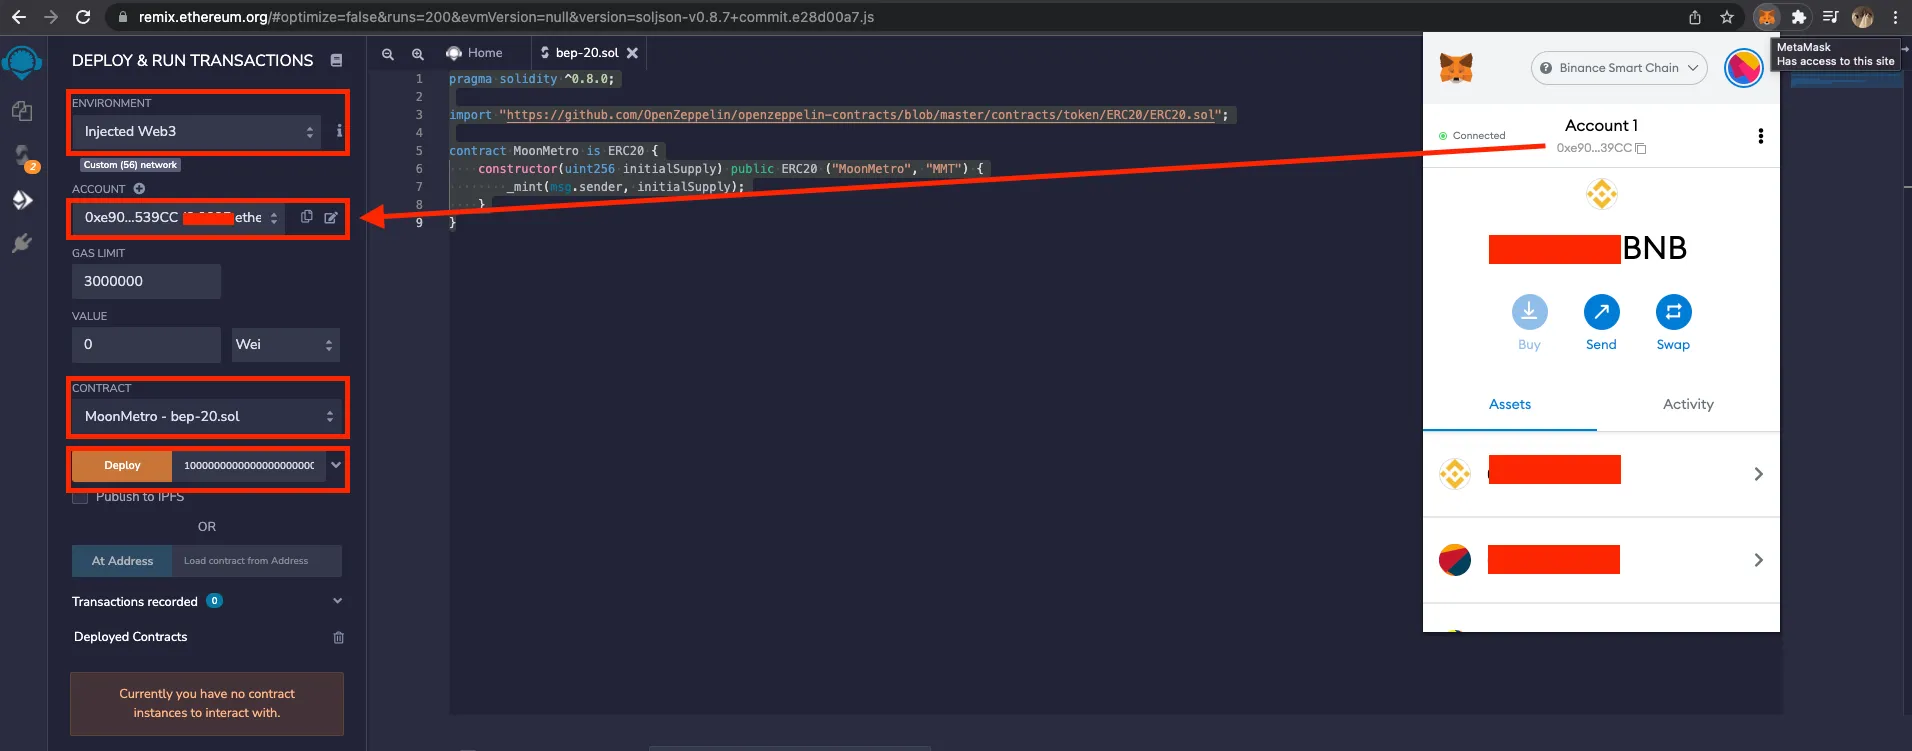
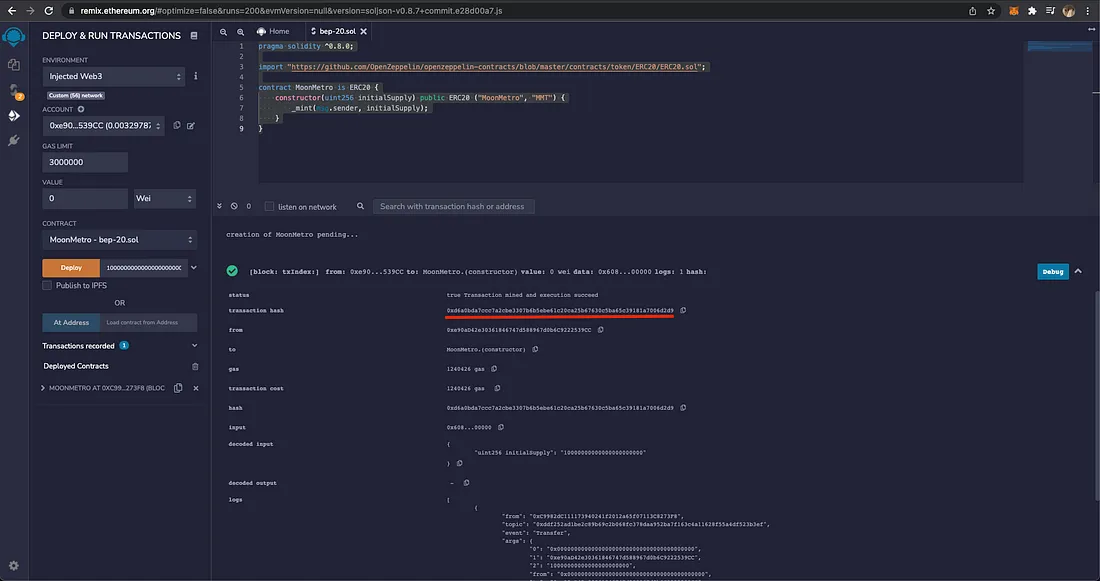
- After clicking the ‘Deploy’ button, the Metamask wallet will prompt you to pay the Gas fee (Gas fee is approximately 3-4 $). Then, click the ‘Confirm’ button to proceed.

- After the deployment is completed, you can take the transaction hash and check it on https://bscscan.com/
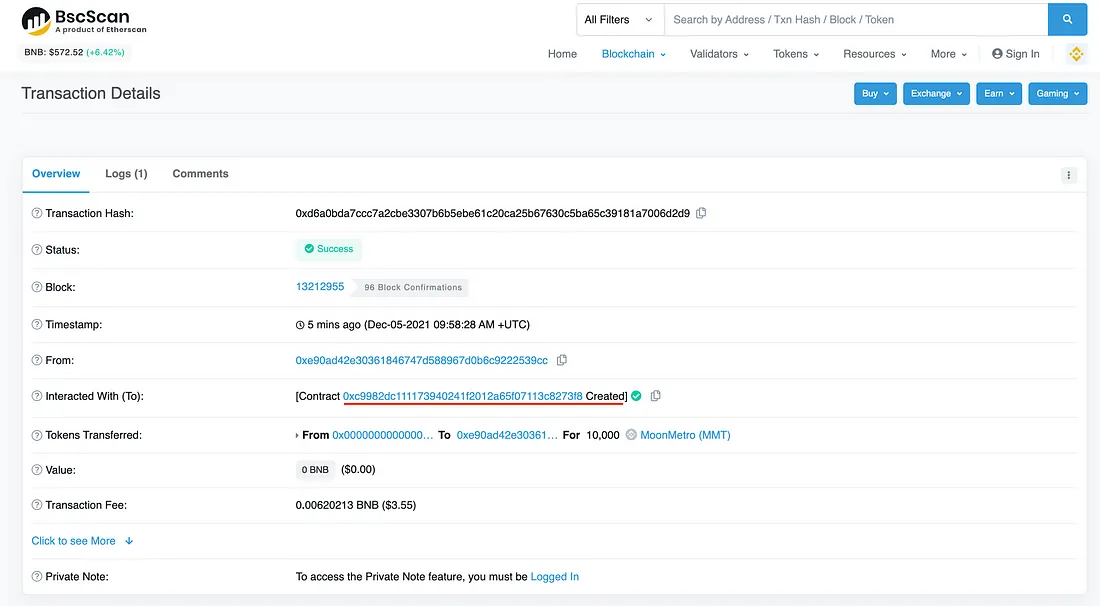
- If you click on the link under ‘Interacted With (To), it will direct you to the newly created coin.
![]()
- Click copy to save the Contract Address of your newly created coin.
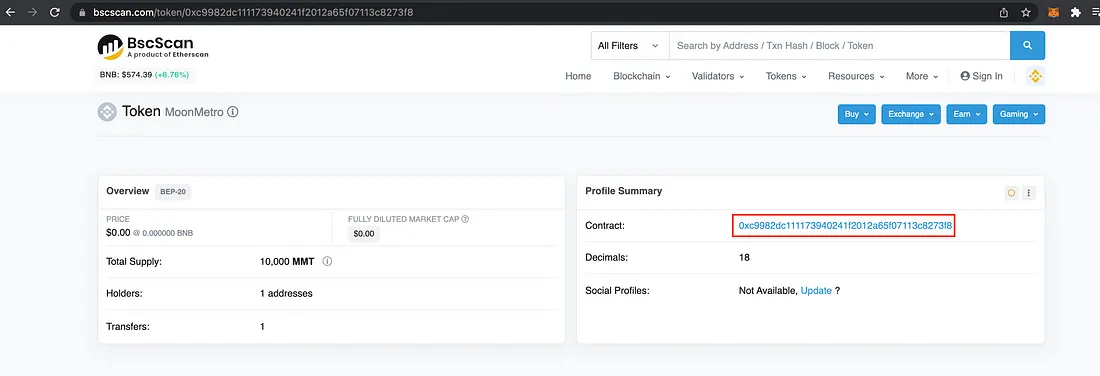
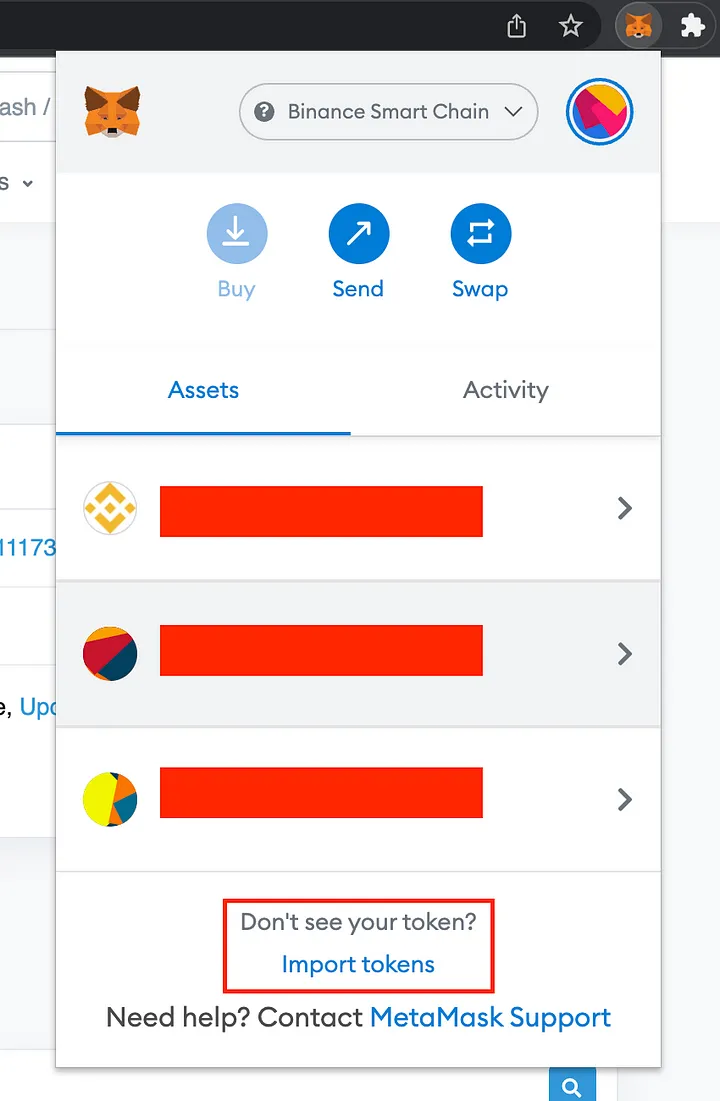
- Open your Metamask wallet and select the Binance Smart Chain Network. Then, scroll down to the bottom and choose ‘Import Token’.
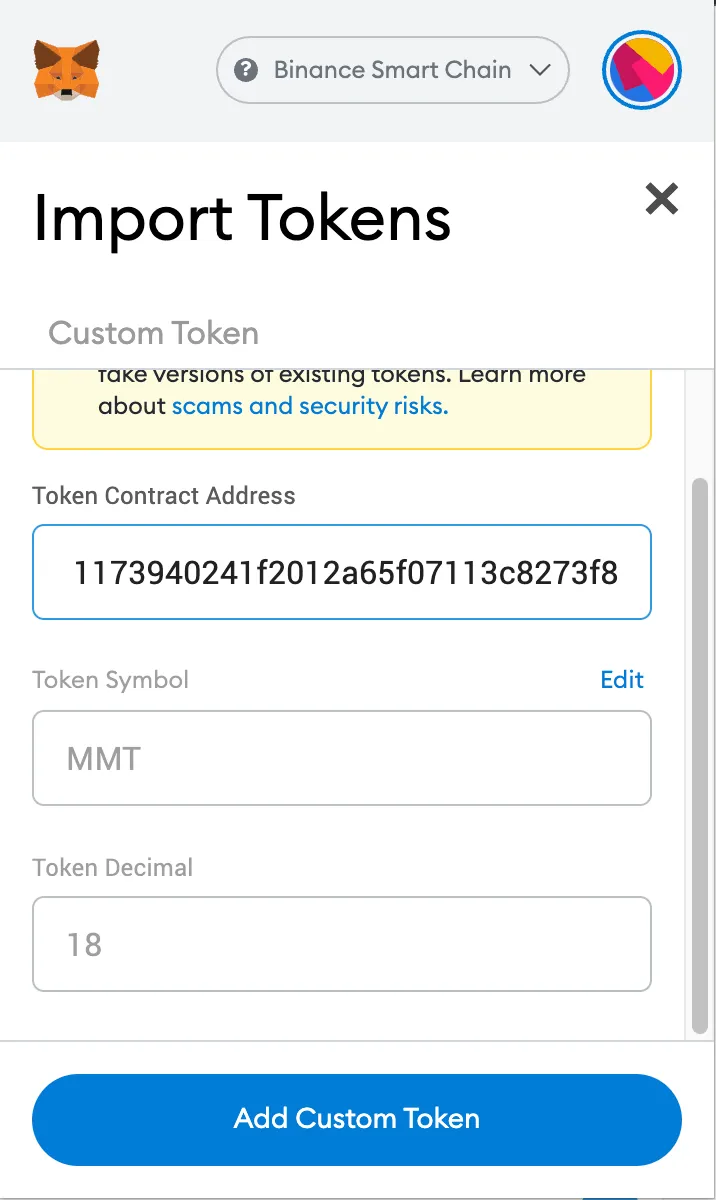
- Enter the Token Contract Address and then click on the ‘Add Custom Token’ button followed by the ‘Import Tokens’ button.
- And there you have it! The coin that you created should now appear in your Metamask wallet. Yeah! 🎉
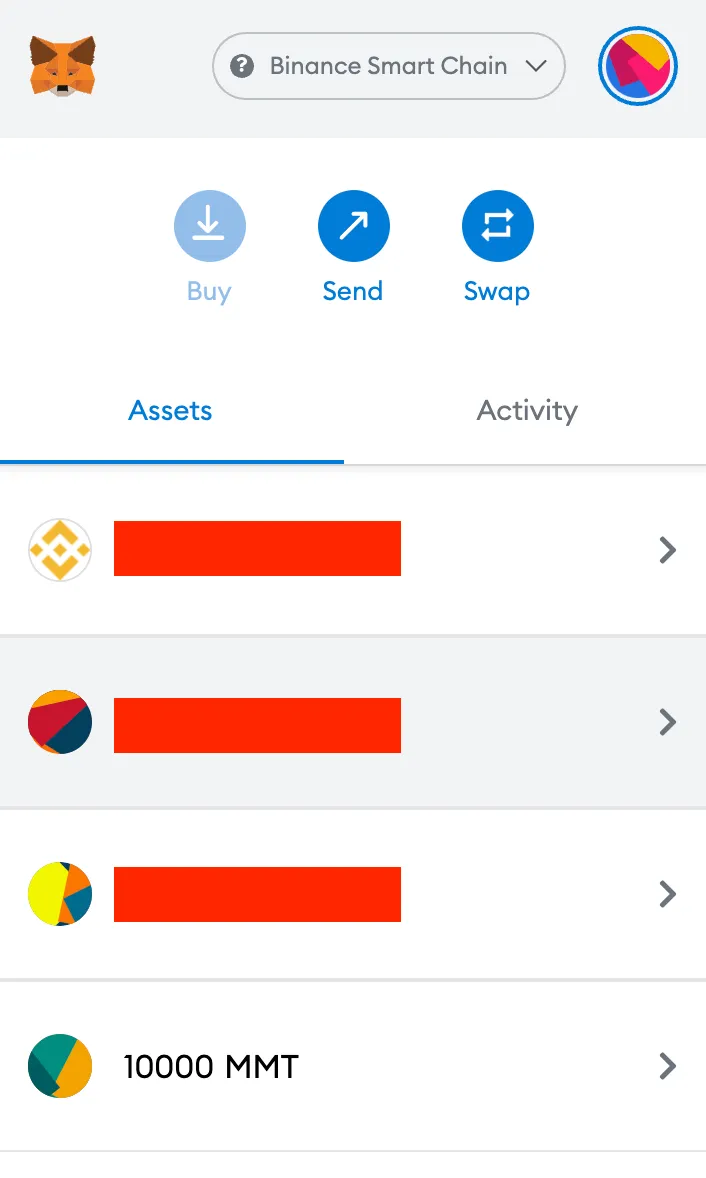
At last, we now have our very own coin! 🎉 You can take this coin and use it for various purposes, such as selling it on PancakeSwap, distributing it as a token in games, integrating it into different systems, or anything else, it’s all up to you!
I hope this content has been beneficial to everyone interested. Goodbye! 👋